If you do not want to read about chickens used for meat, you may want to skip over this post. We are omnivores here.. so we eat meat, and enjoy eating meat. If I am going to eat it, I am going to raise it if possible, and know that what is on my plate has had a wonderful life full of adventures and fresh air. I will not send my birds to the butcher either. I want them to spend their very best and the one bad moment here at our farm. It is less stress on the birds in the end, and those are my feelings on the subject.
So please, if you are vegan or vegetarian move along.. Don’t read this.. Unless you are looking for proof that chickens for meat can be raised humanely. They also can be killed humanely – and that to me is of the very highest importance. We are thankful for every bite of chicken we take. We know that the animal did not live in vain. They were raised with love and care and strict attention to detail in their management.
I feel a very strong urge to advocate for all the abundant misinformation about the common broiler chickens and their apparent disturbing behaviour everyone seems to go on about.
Here are some of the many labels I often see associated with the CX:
Disgusting
Ugly
Smelly
Lazy
Can’t walk (leg issues)
Won’t forage..
Lays in their own filth
Organ failure – heart attacks common
Stupid
Tasty (*this one is true*)
What you don’t know is that all of this has to do with improper management! If your CX are disgusting, smelly, lazy, spending much of the day sleeping in their own filth before dying of heart failure, it is YOUR improper husbandry that is the issue, not the Cornish X! if you don’t know any better on how to raise them, I can’t really blame you. The feeding guides shown online make my jaw drop. No wonder your birds are laying around, pooping every 5 seconds and sleeping in it. It’s not your fault. The instructions on raising the CX have mislead you. All the falsity is overwhelming. Threads on backyard chickens with the titles like: Cornish X’s = Nastiest birds EVER, does not help their case any either.
Last year I had written off the CX as a Frankenchicken based on all the info I read about online. I was dead-set against raising them on my free range only farm. I didn’t want to have birds penned up for their entire life.. I heard that they can’t/won’t free range… I put my foot down… Until I saw one video that made me second guess everything I’ve read about prior. Maybe they can free range and be chickens after all? I might as well give it a shot.. If they don’t pan out, I can at least say I tried, right?
This is MY experience with the Broiler better known as the Cornish X, CX or Meat Kings.
I had a rough time with them from day 1 to 14 It was extremely humid and incredibly hot.. we had a run in with Cocci and lost 7 CX and 10 RSL chicks. We did not treat for cocci, but offered electrolytes (Stress Aid) the day after we noticed low movement and puffiness despite the heat. They went quickly. Here you can not get Amprol without a vet’s prescription. It took me 48 hours to get my hands on some, and by that time the electrolytes really perked them up. The strong survived. After they were on grass, the birds were golden. No more illness (save one) who I moved back in and gave amprol (the only one that was ever dosed). Chick was fine within 2 days and back out with everyone.
Two Weeks (Day 14-20)
I opened the pop door. I continued to offer electrolyte water because of the heat being so stressful on the chicks. I found the first week they really didn’t go very far. They could not understand the concept of going BACK INSIDE at night. I had to pick each chick up and place inside the pop door (this includes the red sex link chicks).
Three Weeks (Day 21-27)
Finally the CX are spreading out and returning to the pen at night on their own. Real feathers coming in. They are a good 3 times the size of their hatch mates (the red sex link layers).
Four Weeks (day 28-34)
Really good at foraging now. They run as soon as they hear the back screen door slam shut. They want treats. They are getting closer and closer to my neighbour’s property line.
Five Weeks(day 34-40)
Almost 100% feathered out. They are passing our property lines and ranging two acres now. I do not like to watch them eat. They inhale food. I do love watching them forage, and they are very active. As soon as the pop door is open they are off..
Six weeks (day 40-46)
Not much change since week five for experience. They have grown some. They are ranging exceptionally well. No leg injuries save one I jammed in the sliding door of the barn. She will be the first processed. Haven’t lost a single one since cocci outbreak.
See video proof of my CX birds free ranging @ 6 weeks (with other heritage birds.. and goats.. and rabbits). Many of them run like Phoebe on Friends
Seven weeks (day 47-53)
I processed the girl with the injured leg. She was limping, but still got around. I didn’t want it to get any worse so she was processed along with three others. They were too small at this age. Roughly 3 pounds. We were going to do ten, but after seeing the first four gutted and weighed, we decided against it.
Eight weeks (day 54 – 60)
This is when most would start processing the CX. I figured they are still getting around very well, so I’ll give them a little longer.. May do the boys at 9 weeks..
Nine Weeks (day 61-67)
They were hogging all the food at feeding time from EVERYONE, so we processed the largest 10 boys at 9 weeks old. Averaged out about 4.5 pounds. Largest was 5 pounds, smallest was just under 4. Much more breast meat seen than at 7 weeks.
10-11 Weeks (day 68-81)
picture is at almost 11 weeks – I have 28 left to process. 4 are boys, 24 girls. Two of the girls look very small. I think I may keep them to laying age. A strict feeding regime is important to do this.. I want to see what they will give out when bred to a Heritage Plymouth Rock. I know they don’t breed true.
At 12 weeks of age (88 days old) we processed 26 chickens. 22 pullets and 4 cockerels. You can see them in this video at that age. They were still extremely active and a good size. After they were processed (neck, feet and wing tips off) they averaged 5.5 pounds each. Smallest over 5 pounds, largest over 6. One chicken can feed 8 no problem (unless you are feeding teenage boys) 😉
All in all I loved my experience with the CX. They arenotthe monsters you read about throughout the meat bird forum on BYC.
What they are:
active,
intelligent
healthy
friendly
They are just chickens who just happen to be extremely food motivated, and were bred to gain weight at a 50:50 feed conversion ratio.
The poop smells like poop. The smell is not indistinguishable between any other breed of chicken I have raised. IT smells like poop. Keeping the litter dry and practising the deep litter method surely helps. If it is very humid out, I find Stable Boy helps greatly with the smell. They do poop bigger than other chickens their age because they EAT more.
If they are not allowed access to full feeders at all hours of the day, they will go on a mission, searching high and low for all of the food that our beautiful mother nature has to offer them. They are amongst the best foragers I have ever witnessed.
The only negatives I have noted is that they are food aggressive, so ample feeder space is required. They also do eat extremely fast and to watch them is not pleasant. It’s like watching a starving animal inhale their offerings twice a day. No matter what, they always seem to be hungry. They are not starving. Don’t let them trick you into feeding them at all hours because they INSIST they are starving. I don’t buy it 😉
Please help stop the misinformation about the Cornish X!
To mark a very awesome contest we are holding on our Facebook Page thanks to Brinsea’s generous offer to sponsor our contest, here is a review of their product!
Silver Pencilled Plymouth Rocks relaxing under the Brinsea EcoGlow 20
As you all know, in February we had a terrible fire due to overloaded extension cords resulting from heating brooders, waters, etc. Well clearly after that horrific experience we wanted to improve our methods of heating our chicks. We did a lot of research online about the Brinsea EcoGlow units, and I placed an order back in April. A couple weeks later my package arrived containing my four units that heat 20 chicks a each. Seriously, I should have ordered the EcoGlow 50!
I put the EcoGlows right to work, heating our chicks inside the house, as temperatures outside still dipped past freezing overnight. One downfall about this product is that it is recommended not to be used in temperatures lower than 50 degrees Fahrenheit ~ or 10 Degrees Celsius. The room temperature has to be at least 50F to heat sufficiently for newly hatched chicks. I’d tell you that I believe they state this just so they have their back covered, However, I don’t want to be blamed if you follow my experience and lose chicks because of it, so let’s keep it in the 50’s okay? I have let it dip down to the high 30’s and the chicks were warm and toasty. It wasn’t drafty, which is important.. it’s important to keep chicks draft free no matter what you decide to heat with.
These units would most likely work better for smaller operations because of this. How many of you brood your chicks inside the house? I assume quite a few of you do.. So there is no worries about the temperature minimum requirement. Since we brood our chicks in the barn, we had even designed a room in there that can be heated while the rest of the barn remains unheated.. just to run our EcoGlows year round.. That is just how much we love these units!
The dimensions of the EcoGlow 20 are: Length 13” (320mm), Width 8.5” (207mm), Height 8.5” (210mm). Weight 1.65 Lbs (750g).
The power consumption is remarkably low at 20 Watts! A traditional heat lamp bulb is 175 – 250 Watts. That’s only the bulb. The 20 Watts is the entire EcoGlow 20 unit.
Not only do the chicks thrive with this unit, I feel very safe leaving it on day and night without feeling anxious that it could cause a fire.
The EcoGlow allows for natural sleep cycles. The chicks will sleep all night under the warmth of the EcoGlow. If you have ever had to wean chicks off of the heat lamp, I am sure you know the distress they go through in the transition. Loud crying every night until they are used to the natural daylight cycle.
Despite the small dimensions, this unit does really heat 20 chicks until they no longer need the heat. It acts similarly to a broody hen. The chicks go under it as they need warmth, and come out when they need to eat, drink and scratch around. It only took a few days for our chicks to realize that the EcoGlow is an awesome place to roost.
This is one of the downfalls of using the EcoGlow over a traditional heat lamp.. There is poop that inevitably gets on the top of the product.
A Partridge Silkie enjoying the top of the EcoGlow as they tend to do at this age.
Two EcoGlow 20’s being used to rear 40 chicks in our brooder.
Have you ever reared chicks that were prone to flip? If you have not, you are lucky. I have had my fair share of ‘flippers’. This describes chicks who tend to flip onto their back and have trouble righting themselves the first few days, due to their belly being swollen and heavy from absorbing the yolk. Under a heat lamp they would often over heat and inevitably die while I was at work, not able to check on them every hour or so. Not with the EcoGlow!
Here in Canada you can order the EcoGlow’s from C. Botkin Enterprises and if you live in the USA you can order them directly from the Brinsea website. But really, you should participate in our contest to WIN your very own Brinsea EcoGlow 20 in our Cutest Baby Poultry contest! Contest deadline is August 21st 2013, so submit your pictures on our Facebook Wall.
Rules:
Max THREE pictures per person
MUST be your picture!
Can be a chick, poult, keet, duckling or gosling.
Please describe your baby chicks. Let us know what they are: breed and species. If you do not know what breed, just let us know. Others will ask, so it’s best to mention it in your submission 🙂
Picture size should be at least 400 x 600, but can be larger.
So where do I start.. at the beginning? How it came to be?
The STORY
I warn you.. To get where we are today we had to go through a tremendous tragedy. I have been through a lot in my life, but losing my barn, and all my animals was the worst. I am the type of person that connects more with animals than humans. The animals were my family. My love, my joy, my passion. When I get into something, I dive in, head first – giving it with my heart. My dream is to breed and raise poultry, goats, dogs, etc. I was right on track. We had finished building our first 12 pen breeding pen the night of the tragedy. I had separated my Houdans, Barred Plymouth Rocks, Silkies, Naked Necks, Easter Eggers, and Sizzles. We were exhausted. So tired..
I took a nice hot bath and went to bed. Our in-laws live with us for a few months of the year. I was awoken at 1:15am to my mother-in-law screaming “THE BARN IS ON FIRE!” Everything happened so fast. I ran up the stairs as fast as I could. Thinking she was obviously crazy. How could that be? And if it was, I could save them. Oh I was so wrong. I was so, so wrong.
When I look at these pictures my heart aches. My father-in-law documented the fire. He was doing it for insurance purposes, and for us to look back and see that, there is no way we could have done a thing to save them. This was probably 2 minutes after I came up stairs. The roof had just collapsed.
We lost roughly 150 chickens, 6 ducks, 4 turkeys, 4 geese, 2 sheep and our beloved Livestock Guardian Dog Clementine. Not one of them escaped the blaze.
It’s hard to explain the tremendous emptiness that accompanies a loss this large. Words don’t even make sense. Nothing makes sense. Not eating.. not sleeping.. No there weren’t any human lives lost in the fire, but that is no consolation to me at all. Some of those birds in there, and Clem, where my children. Honest.. and I grieved.. hard, but with darkness comes light. We have slowly come out of this tragedy and began to start all over again – from scratch.
Oh and we had 12 chicks in the basement at the time of the fire, and one REALLY lucky hen with frost bite.. Luckiest frost bite ever… She was inside recovering when it happened. Margaret is very special to us, and is the one remaining chicken from our previous barn:
The fire Marshall determined the point of origin to be around the fuse box area. We had hay stored on top of a box next to a maze of extension cords. We didn’t know. We did not know how incredibly dangerous extension cords are.. The heat lamps we had going on chicks were not even close to the Point of Origin..
Anyway.. To read more on Fire Safety please do so by clicking HERE.
Watch Margaret’s video:
———————————————————————————————————————
Because I want to give you guys some perspective on what the barn looked like previously – it was beautiful. And large. It had an upstairs, and 5 different parts. It was bigger than our new barn if you consider the upstairs. We have maybe 3 feet extra on the end of our new barn’s foundation.
This barn was insured. So if you have taken nothing out of the importance of fire safety, at least take the “Properly insure!” advice. It does not cost a lot to insure an outbuilding. It is well worth it if anything happens… Some insurance plans have a cap for livestock. I suggest choosing one that does. Unfortunately our insurance did not. Next time fore sure. We lost over $5,000 worth of animals easily.
The REBUILD
Now that the beginning has been explained in detail, lets get to the light at the end of the tunnel – the NEW barn. There will be twists and turns through this article. Don’t expect your average coop page. I’ll try not to make it too confusing, but if I lose you, I apologize in advance
I drew out all the plans. I wanted it just so… But after the barn was laid out, the windows/doors moved around a bit…
This first image is the original drawing. The barn all put together. After that, I created separate drawings for each room on the computer…
Note that the entire barn will be insulated.
The Chicken Barn. It’s going to be big. Roosts tucked away into a corner so they are out of the way. We will be able to remove each roost for easy cleaning. The entrance has a big sliding door. All of the breeding pens have pop doors for access to outside covered runs for breeding season. There will be two pop doors under the windows on the left wall so I can ‘try’ to keep the goats out of the chicken part of the barn. Still not sure how well that will work.
This is the only heated room in the barn. It will be heated with forced air (wall unit) as per the Fire Marshall’s suggestion. These units will need to be cleaned from dust, but are much safer than any other option we’ve checked on.
The Goat barn – We plan on having roughly 3 goats and one alpaca. This part of the barn looks plain in comparison with the chicken barn. Windows are smaller, and set higher so they can’t kick them out.
This is our Tractor Storage area. We need a place to keep our equipment… even if it is just a lawn tractor and small trailer for hauling. This is where it will stay. We also decided to put shelving units up for any extra supplies, such as extra feeders, waterers, etc.
The first step was clearing the debris from the fire. Unfortunately we had a terrible, awful person do it. They did not do as they said they would, and our building contractor had to hire someone to finish the job the first guy was supposed to do.
The lesson in this: Get some references..
This is what was left after they cleaned it up. They didn’t take everything, and they were supposed to level it out. They didn’t..
Watching the debris being removed was traumatic for us.
After that was done, we had to wait… wait for the darn snow to melt. At this time it was March, and we live in Eastern Canada.. It takes a long time for snow to melt.. and after it does, there is a sloppy wet mess that you have to wait for it to dry up.. The rain that comes with spring sure didn’t help the land dry up – and we have a very low sitting property. Water takes a long time to soak in. This is very beneficial in the summer. When we have a drought, and everyone has drying grass, our property is lush and full. In the spring, it is wet, soggy and slippery…
If we were to wait for the property to fully dry up we would have to wait until summer to build, as they couldn’t bring a cement truck down in the muddy mess without it getting stuck.. So we hired someone to come in and put a road in. Best idea ever. They were GREAT contractors. Timely, efficient and very pleasant to speak with.
They scraped up all the sod that was muddy and messy, and created a road flush with the property. This picture is when they first did it.
Late April – it was all packed firmly down. The re-build was able to be started!
Please notice the baby barn in the picture. After our barn fire, we needed immediate accommodations for the 12 chicks (and Margaret) that were currently living in pens FAR too small for them in our basement. We were going to put them in the barn the day of the fire, but due to the exhaustion from building the breeding pens – we decided to wait a day. Can you imagine? They would all be gone if it wasn’t for our laziness.
This is the younger group in the playpen prior to getting our baby barn.
Thanks to everyone on our Facebook page who made housing these guys possible. We didn’t have any money to put into building them a coop, as we had JUST spent everything on a feed run, and on the beautiful breeding pens we worked so hard on. There was nothing we could build outside in the snow in February. We had another wonderful contractor build the baby barn inside their garage and deliver it.
Here it is the day we had it delivered. Still a lot of snow on the ground. It was delivered February 28th 2013. 17 days after the fire.
We will use this baby barn for something, though we can’t quite agree on what. I want to use it for chickens.. Susan wants to use it for the pigs or hay storage. Hard to say for sure yet. It will be put to good use, and was very well made. There is a pop door on the back.
Which is quite large. I COULD use the baby barn for the geese…
Anyway.. Let’s get back to the actual BARN barn. On May 1st 2013 the first load of gravel was delivered, and temporary power was set up. Rod Spirritts is our contractor of this barn, with Spirritts Construction Ltd. Rod is a Master Craftsman and has a degree or something in something making him better at what he does. He is VERY good at what he does. So, yes.. They rigged up power and delivered gravel. We discussed our next step as Rod said we would need to raise up the base and make it level. The clean up crew was supposed to do this, but they didn’t… so we had to hire the same guy that did our driveway, which made our end cost quite a bit more ($1,200 more) and we’ve already reached our insurance cap. Also our electrical was not up to code, another wham to our budget.
Breathe.. It will all be worth it in the end.
The chickens like to think they are the real brains behind this project
The chickens inspecting the work they did on May 6th. They cut down a dead tree that was burnt from the fire, and levelled out the plot (still a bit more of that to go in the picture) and extended the base.
Once they finished up with the plot, Rod’s crew constructed the footings. We are counting May 6th as the official DAY ONE – May 7th 2013 above. The concrete was poured on Thursday May 8th.
and we drew Les Farms in the cement in the entrance of the hallway.
The concrete had to sit and harden over the weekend before the footings were removed. Counting the day of pouring the cement as day 3!
I’m not counting the day they couldn’t work while waiting for the concrete to harden..
The fourth day they removed the footings and started framing up the walls. This is Monday May 13th 2013.
On Tuesday, May 14th they finished the entire external frame. You can see where the windows are to be placed.
At this point, everything looked incredibly tiny.
You will notice that we decided to have dirt floors in the livestock areas. We are big believers in deep litter, and it works so much better with dirt floors.
Really starting to look like something at this point.
The next day was incredibly rainy, so they set everything up that they would need to start putting up the trusses that Friday.
On Friday, May 17th the trusses were all put up and gorgeous.. So symmetrical….
End of week two. The shell is all complete.
I apologize for the quality of this picture. It was taken via cell phone.. On Tuesday May 21st they started putting up the steel roof (Note Monday May 20th was a Canadian Holiday), and on Wednesday May 22nd they finished the roof and put in all the windows!
The above picture shows the 4 windows in the breeding pens in the chicken part of the barn.
The goat area.
On Thursday May 23rd they worked on the siding. The back is complete! Oooo Pretty colour! and also started the trim work.
On Friday May 24th it was raining cats and dogs. They couldn’t finish the siding until it let up, so they started building interior walls!
Inserting the plan layout again so you can follow along without having to go back up to the beginning.. You can see the entrance leads to the exit. People area only.
May 24th 2013
Entrance…
May 24th 2013
The right wing – where it will open to the goat area. To the right you have the brooder/tack room.
May 24th 2013
Like so. Looking bigger now!
May 24th 2013
The Tractor & Storage area.
May 24th 2013
The chicken part of the barn again.
May 24th 2013
You can see they’ve also started putting insulation along the trusses. The entire barn will be insulated. He is also very aware of the ventilation needs of livestock, so no worries there.
May 24th 2013
The big door in the chicken area. Because we will want to get our tractor in there for bedding clean up and what not. The door will be sliding, where we had thought at first to make it open by swinging.
So this is the progress end of day Friday May 24th.
Monday May 27th 2013 – they have half the siding finished. You can really see that nice barn red from our sunroom windows in the house now!
Tuesday May 28th 2013 – They finished all the siding. Isn’t it beautiful? The electrician came and went over things with Susan. Rod is all good to start insulating 🙂
Friday May 31st 2013
The interior is all sided save a few places for the fuse box and wiring. Here is the Roost area in the chicken barn.. Koda will be your tour guide 😉
They worked on this part Wednesday, Thursday and Friday – May 29th, 30th & 31st. Rod says they are still right on track with a completion date of June 5th 2013!
Friday May 31st 2013
The hallway leading from the chicken barn to the goat barn is quite dark with the OSB board. We plan on painting this in the future. Above you can see where we will have access to the attic.
Friday May 31st 2013
The empty part is where they are putting the fuse box.. They will take a foot out of the breeding pen to allow for access to it safely. This room is also quite dark, and does not have any windows (but will have the dutch door that will stay open throughout the day).
Friday May 31st 2013
This is the side of the larger breeding pen Wall is still not framed in there.
Friday May 31st 2013
The brooder room. This is also quite dark. Especially in the evening. Going to paint this for sure. Maybe do a mural.. It’s going to be my favourite room after all 😀
Friday May 31st 2013
This is the goat part of the barn. Windows are higher so that they can’t directly kick them or anything.
Friday May 31st 2013
We realized we didn’t make this area big enough for our tractor and our trailer.. and it would be a good walk in a snowstorm to retrieve the snowblower, so now it will just be storage (or possibly an area for our meat kings!)
Friday May 31st 2013
The West side of the barn where the breeding pens exit to runs. Pop doors are constructed.
Monday June 3rd 2013
Breeding pen construction is underway. As you can see, they started with our 4×4 pens in the chicken part of the barn. This is where we will house trios or quads. That gives them 4 square feet of indoor space each. We will be constructing runs as well. In time….
Monday June 3rd 2013
The doors will slide up and hook. We’ll have to install some safety measures to ensure they are predator safe.
Monday June 3rd 2013
We painted this hallway/breeding room white over the weekend. Don’t ever do that.. Well, at least not with properly researching how to paint OSB first.. 5 gallons, and $80 worth of paint later we have one room painted.. My muscles ache. Took me 4 coats. OSB is a pain in the butt to paint. Prime first.. Yes.. Should have primed first..
Anyway, here are the large breeding runs framed out. Koda again leading the way 🙂
Monday June 3rd 2013
Here is the fuse panel area. They cut out a bit of the breeding pen, but not much.
Monday June 3rd 2013
Only one has chicken wire on it today. I believe I’ll use these to brood my layers and meaties until they can be free ranged – roughly 4 weeks for the layers and 2 weeks for the meaties. Pop doors will be situated on the outside wall.
Monday June 3rd 2013
We’ve decided that 4 feet deep is just too deep to clean properly. We are cutting it down to 3 feet and will have removable walls so that we can have 3 on the bottom, 3 on top, or one large brooder on each floor. Or 2 on each.. etc… Possibilities!
Thursday June 6th 2013
They have finished the brooders, small breeding pens and one of the large breeding pens. We are still waiting on doors and finishing touches. Delayed another week.
Here is the brooders after we painted them with two coats of primer. Still have to get the corners, but the paint has really made it look brighter, and this picture was taken at 9pm at night, so sun was down.
Note to self: Paint BEFORE pens are installed.. so much easier.
Barn was completely finished June 20th 2013 with all finishing touches.
It ended differently than we initially wanted, but we went for practicality and functionality and decided against the slanted roof on one side because of the snow load we get in the winter.
Finally photographed the entire interior to show you guys!
Starting here.. Hallway from the Exit to the Entrance door. Both are dutch style doors. We have them open 24/7 for air flow. Pens on left and right in the exit hallway.
Hallway from the front entrance to the exit. We painted this entire area.. A whole lot of work and paint went into that.. 15 Gallons!
It was too white so we hung chicken decorations!
The Juvenile grow out pen. Currently home to 20 Houdans, 10 Easter Eggers, 5 Ameraucanas, 18 Silkies, Sweet Brown the duck and Pickles & Patty. Only at night though. They free range all day. It’s the only room that is goat proof so far.. this is where everyone eats.
The Juvenile grow out pen again. Dust bath pan on the right. They get their water outside. Sweet Brown makes a terrible mess. You can see how I’ve made the door super narrow. The goats can not get through this, but the chicks and the smart adults can squeeze through.
The Meat King & Layer Chick pen. Once they are two weeks old I will open the pop door to the great big world. They are 11 days old right now, so this weekend it is!
The Meat King & Layer Chick pen again. Room to run around.
The pens from the hallway view. Susan installed shaving barriers all along them, but they like to roost and poop on the wrong side Good thing we have a shop vac!
The hallway that leads to the heated brooder room, and the goat room.
The brooders. Ignore the fly tape. The flies and mosquitoes are bad right now, so we have set out traps.
There is a light in the bottom pen because it’s dark in there.
Here is the bottom brooder with the two partitions removed. The top brooder is currently empty, but also looks very similar (except it’s taller of course).
Storage room looking out to the brooder room.
Storage Room. Can you spot anything special on the shelves?
More of the storage room. Kittens get fed in here.
The empty goat barn. The goats are living with the chickens right now. We have to dig a trench for the water in this room. We didn’t want to do that after the bedding.. so it’s being used for random things. Right now I have a very small hatch (4 chicks) in one of the playpens. I usually open this room up and the chickens lay in some boxes behind the light blue playpen. It’s the coolest room in the barn in terms of temperature
Hallway that leads to chicken part of the barn. Henry has been spending his days inside the barn with the kittens instead of his kennel while we are at work. Trying to desensitize him to the chicks, and giving him something fun to do (play with his kittens). He loves it!
The roosts.
Going to have to brace this soon. You can see it sagging in the middle. Also, its not staggered very well, but right now no one sleeps on the lower roost, so no biggie.
The chicken barn (well, the geese and duck live in there too, so it’s really the poultry barn). Dust bath pool in corner. Geese have their own pool outside.
Breeding pens in the Chicken Barn. Currently occupied by Margaret, and three different pens of silkies. Blue in one, White in the other two. The pen to the far right has two broody silkie hens with their chicks.
Last picture – the chicken barn again. The goats’ feeding area. The chickens have taken to laying their eggs in the hay rack
So you are new to keeping roosters.. or you are not new, and want to know where you went wrong with the rooster you have. He is aggressive, cocky and you just don’t like him.
I’ve raised my fair share of roosters. We had 15 full time boys that we used for breeding (at least). Only one of them was a little cockier than I would have liked him to be…
Gigi.. for those of you who need a visual. Maybe he was pissed at me for tying his hair back.. Maybe he just couldn’t handle the pressure.. Who knows. He chased both Susan and Dylan, and flogged our neighbour (who kicked him in the ass and was immediately given respect from Gigi).
Now.. For the most part I would suggest eating an aggressive rooster, but I took the time to train this behaviour out of Gigi. Yes it can sometimes be done.. not always, but sometimes. I would not suggest even trying with one that had no value to your breeding program, or with one that has attacked children – but Gigi was trained to respect humans after a few minutes of stick training a day for a week. (will post separately about this if requested).
To avoid even getting to that point, here is what needs to happen:
As soon as you can tell a chick is a male, do not handle the chick other than to check it over for injuries or illnesses. If the chick puffs up it’s chest at your hand in the brooder, ping it and make it move away from your hand. The goal is to make this future man respect your presence, and to respect that YOU are boss.
Never walk around a rooster. Walk through him. Make him move. You are the boss. You are alpha rooster! Even if you are a woman, you are still the head of this flock!
Do not let the roosters breed in your close proximity. Yes that is what you have a rooster for, but if he mates a hen right at your feet, that is blatant disrespect. Remember, you are the head rooster! Try to think like one.. If you see your underling mate your woman right in front of you, what are you going to do? Let him? No! Push him off of her. Chase the boy away after he is kicked off. Just like a real alpha rooster would!
Don’t hand feed your cockerels. This teaches them (like handling does) that you are not to be respected.
The hens are the only ones I care to be friendly with. Roosters need to be timid of you, otherwise they are very likely to attack when you are trying to catch a hen, when you come too close to the hens, or are invading their space.
Think of yourself as the ALPHA. If your beta rooster is coming too close, you peck them. You don’t let them with your girls when you are present.
If you ever get one that needs correcting – I love using twigs. I don’t hit them with it or anything. I poke them and make them move away from it. They don’t like to be touched. This makes them give me a wide bubble of personal space.
I know it’s hard to abstain from handling the boys. You can if you want, but it did not work out well for Gigi, who was always handled as a chick (he was funny and everyone liked him).
You want keeping roosters to be a pleasurable experience and it will be if you take the time to understand them and what they need. They are not created to be pets. Their instincts tell them to guard and protect and to make others submit. Your job is to be the head rooster, and to make sure they submit to you. By handling them you are showing them you are not worthy of respect and space.
Now I know everyone thinks that it won’t happen to you. I was like that as well. Yeah fires happen, but not to me.
My ignorance was quickly shattered this Monday when we awoke to our barn in full flames. Nothing at all could be done. We lost everything: Two sheep, Four turkeys, Six Ducks, Four Geese, Roughly 100 breeding chickens, 20 chicks and our Livestock Guardian Dog, Clementine.
This isn’t a thread trying to get your condolences, though I really appreciate it. I am heartbroken, yes. They were my passion. My dream.
This thread is designed to make you think twice about what you do in your own barn/coop, and to open your eyes to the risks in things you may not even consider a fire risk.
The obvious – make sure if you have chicks in the barn/coop that you have your heat lamp SECURED. Do not trust the clamps. They can slip off easily and the heat lamp can fall to the ground and catch the shavings on fire.
Extension Cords – Please, please do not use these if you can help it. If you do have to use them, Make sure you are not drawing a lot of power from them (IE: Don’t attach an extension cord to a power block and plug a lot into them).
DUST your lights and outlets regularly. Dust is a big issue.. You know how much dust a couple of chickens can create.. If dust builds up on heat lamps, or even regular light bulbs the dust itself can catch on fire.
If you use extension cords, use heavy duty, and only ones meant for outdoors. Make sure they are all intact and have no rips or tears in the coating.
Another extension cord tip: Do not staple them into the wall to keep out of reach of birds. If you hit the cord itself it can create an issue
Store baled hay AWAY from livestock. Hay/bedding storage should not be near lights, fans, electrical boxes, heaters or outlets.
Flammable substances should be kept away from the barn. (We had 5 propane tanks stored in the loft. BAD idea.
Improperly utilized heat lamps are a major source of barn fires. They are often placed too close to hay and bedding which may ignite quite easily from the heat. Never use extension cords with heat lamps.
When storing newly baled hay, the temperature should be monitored. Adequate ventilation should be provided for additional drying of the hay. If too much heat builds up, spontaneous combustion can occur. (Never purchase hay that is hot – because it can mean that it was baled too wet. In addition to being a fire hazard, the hay may turn moldy, making it unpalatable and unhealthy for horses to eat.)
Outlets and switch boxes should be made of metal and have dust- and water-tight spring-loaded covers that close when released. Ground fault receptacles should be utilized for all outlets.
Quote:
Originally Posted by cyw iar
If I may, I’d like to also recommend that electrical wiring in barns be enclosed in conduit, and all permanent light fixtures be in cages, especially where the larger livestock might potentially break the bulbs by rearing or rough-housing.
And if you can, store hay and bedding in a separate building at least 30 feet away from your barns and house.
We went from this….
To this…
Fire can be prevented. Please be aware, and pass the message along.
If I can save any of you from the anguish I feel – I have served my purpose.
We are rebuilding.. I can’t stop living my dream… Despite the tragedy, I will move on. None of the animals will ever be forgotten. Please follow us on Facebook for any more info: https://www.facebook.com/LesFarmsCanada
Our January thaw is underway, which made perfect weather to make a snowhen. No, not a Snowman.. a Snowhen! One that is so amazingly awesome, that she lays 4 eggs a day and hardly eats at all!
Even working dogs deserve a play break. Clementine is doing a great job watching over the flock. She signals if anything is amiss, and is always on guard. Every night she gets a good romp around. Mornings as well if there is time for her to do so. Weekends she gets to have the most fun. Backpack off.
Playing really tuckers a working dog out.
At least someone is enjoying all that snow. Cause I’m not.
I may be a little off the ball on this post. We added two sheep to our farm over a month ago. Should have said something sooner. Must have slipped my mind. I don’t know how it could though.. they are baaing all the time.
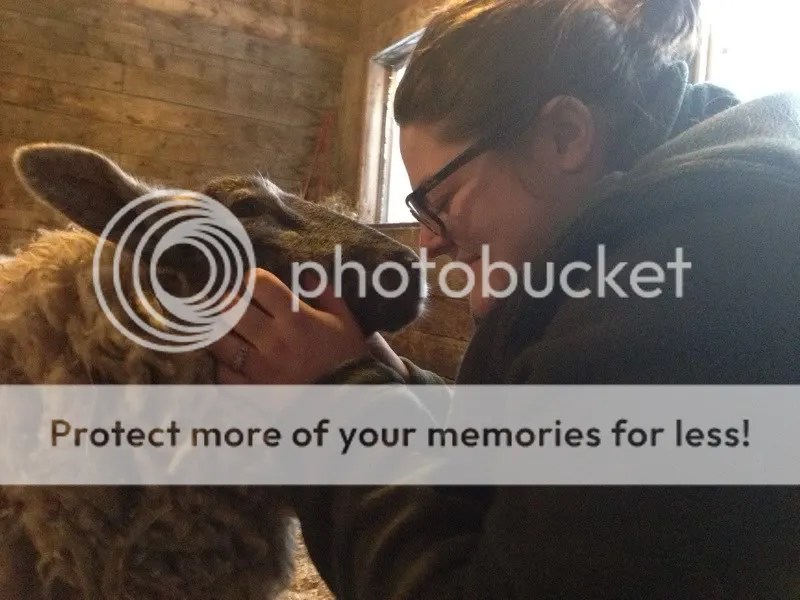
Here is Molly. She can be identified by the poof of wool on her head. She’s also the ring leader and the more daring ewe.
and here is Fancy. Fancy is my girl. She’s more reserved, but enjoys a good scratch. She’ll lay her head on my lap and close her eyes during such times. It’s very endearing. Not that Molly won’t.
Susan loves our girls. Our girls love us.
We had contemplated whether or not we were going to do sheep or goats.. We have discussed goats with many goat owners, and have been told that they are invasive with gardens, They like to climb on top of cars (we have the turkeys for that!) and are just plain mischievous in comparison with sheep. We did want a goat for milk, but were informed that sheep can also be great in that department.
History Sheep have been raised for milk for thousands of years and were milked before cows. The world’s commercial dairy sheep industry is concentrated in Europe and the countries on or near the Mediterranean Sea. The dairy sheep industry is in its infancy in the United States. There are approximately 100 dairy sheep farms in the U.S. They are found mostly in New England and the Upper Midwest. There are several large commercial sheep dairies in New York and California.
Highly nutritious Sheep milk is highly nutritious, richer in vitamins A, B, and E, calcium, phosphorus, potassium, and magnesium than cow’s milk. It contains a higher proportion of short- and medium-chain fatty acids, which have recognized health benefits. For example, short-chain fatty acids have little effect on cholesterol levels in people. They make milk easier to digest.
According to a German researcher, sheep milk has more conjugated linoleic acid (CLA) than the milk from pigs, horses, goats, cattle, and humans. CLA is a cancer-fighting, fat-reducing fat. The fat globules in sheep milk are smaller than the fat globules in cow’s milk, making sheep milk more easily digested.
Sheep milk Sheep milk can be frozen and stored until a sufficient quantity of milk is available to sell or make cheese. Freezing does not affect the cheese-making qualities of the milk.
Sheep milk has a higher solids content than goat or cow milk. As a result, more cheese can be produced from a gallon (or liter) of sheep milk than a gallon (or liter) of goat or cow milk. Sheep milk yields 18 to 25 percent cheese, whereas goat and cow milk only yield 9 to 10 percent.
While sheep usually produce less milk than goats and much less than cows, sheep milk sells for a significantly higher price per pound, almost four times the price of cow milk.
Though I still long for a dwarf goat, the sheep will do for now. They are wooly sheep, so will need to be sheared come spring. That’s something I’m not looking forward to.
as I already have this lamb chop to take care of in that regards. Not a minor feat!
Happy New Year everyone! It’s a cold one out there, and we had another foot of snow dumped on us yesterday.
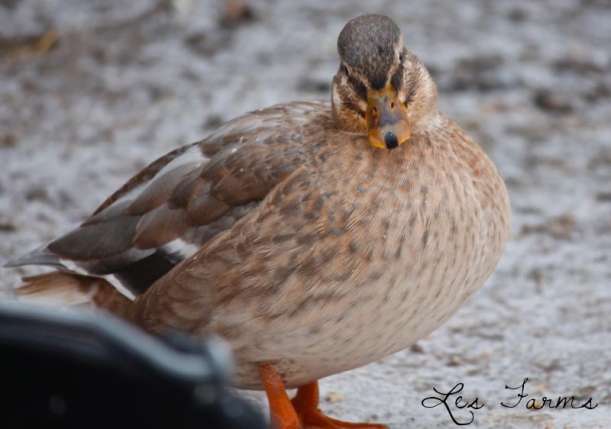
Well at least the ducks are smiling.
Thought I’d throw it out there that I’m working on a Farm Website. Take a look see. If anyone has any questions regarding chickens/ducks/geese/turkeys, please drop me a line and I’ll add it to the F.A.Q page.
Plenty of pictures of the birds for you to enjoy over there. Check out the “Our Farm” part. There is a slideshow I’ve put together.
As promised, I am going to try to stay current with my blog entries. It won’t be every day, but I’ll aim for once a week at least. Even if it is just a few pictures or a little blurb of the going-ons at Les Farms.
It was a white Christmas this year. The world DID NOT end.
We’re under storm watch again today. Another 20 CM expected this afternoon and evening. It makes for a difficult time doing chores, but winter chores are typically a pain. With the birds refusing to come out, and my food freezing – it’s just happy joy joy all around. *sarcasm*
Our pathways are pure ice.. ice and poop.. and feathers.. and who knows what else, but it’s all frozen solid. Frozen and slippery. Thankfully we purchased shoe slip treads to facilitate walking and prevent falling.
Like so. I highly recommend these if you slip and slide on your walk to the chicken coop. These babies are fabulous! Best $5.99 I ‘ve spent this year!
The slippery slopes are no match for hungry groupies. The birds don’t mind the ice.. even when they are doing the splits and giving us side pains from all the laughter. The Pennies still run out to greet me. Or mob me. Take your pick. They are most liable to mob me before bed, when it’s their second feeding time. As you can tell, they are not underfed
They sure make it hard to make my way to the barn without tripping over a chicken – which the shoe treads do not help against.
The barn has been winterized as much as it needs to be for the winter. No heat. No insulation. Their down is enough to keep them toasty warm this winter. I have Timothy hay hanging for the geese – as the majority of their diet during the spring, summer and fall is grass. The chickens enjoy swinging from their hay bale.
Have you guys met the bunnies? We have two that are free ranging… Can’t catch them.. They have a shelter under some pallets and a tarp. We feed them and they stick around. Here’s Frankle. He’s a little off. He has poor coordination. He’ll topple over when he’s walking slow. Maybe he has poor vision, or is just old.. I don’t know. He was given to us during the fall show.
Here is Frankle’s girlfriend Wanda. Who is spade. I am not keen on breeding rabbits. I don’t like confining them, and Frankle’s disability would not be a good idea to pass on. He’s happy though, and that’s all that matters.